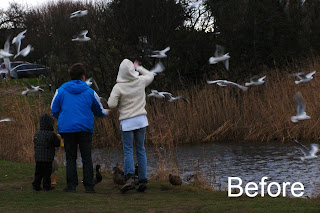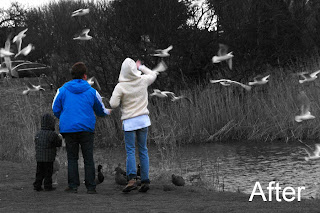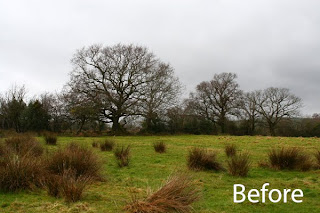
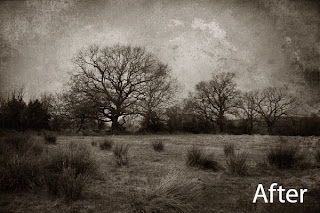
Several folk have been asking me how I produce shots with textures applied so as to simulate an old and tattered look such as the type of shot one might find in a shoebox in the attic, or in Granny's ancient photo album, so here goes.
First off, you will need to use photo editing software which allows you to work on multiple layers. Adobe Photoshop of course is the industry standard but an expensive piece of software. Almost as good is Adobe's consumer version, Photoshop Elements, now up to version 9 but the earlier versions work just fine too. I understand that The Gimp will also allow you to use layers. It is free for download although I haven't ever used it on a layered image, so I can't at this point include a tutorial based around it. Most of the other free packages do not allow the use of layers and so, are not suitable. For the present purpose, I am going to concentrate on Adobe's packages.
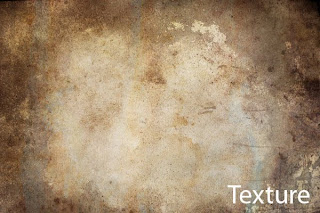
Secondly, you will need a texture (sometimes called a texture screen) to use. Back in the days of the wet darkroom and film, we used to be able to buy ready made screens for the purpose. They were just like a negative and in use were sandwiched with the negative on the roll of film and the two printed together onto the paper. With digital however, you will need to either download some textures off the net, or better still, shoot your own. I am forever shooting textured patterns for this very purpose and keep them all together in a special folder on the hard drive for instant access. The one I am using here was originally a baking tray which met with an accident in the oven. Removed in a rather charred state it was thrown out into the back yard, where it remains to this day. A while back though, after it had taken on a strange and rusted look, I photographed it, to add to my collection of textures.
Right then, with our texture lurking on the hard drive and a suitable image to begin work on, where do we go next? Here we go...
1. Open up the start image and convert it to black and white. The easiest way to do this is to simply go to Image... Adjustments... Desaturate. This is not necessarily the best way but for our purposes it will do fine.
2. Now open up your texture and perform the same desaturation routine on it.
3. Using the Move Tool (4 headed arrow symbol), click into the texture shot which should have been moved aside a bit if needs be so that you can see your start image and drag the texture onto the start image. The texture shot itself can now be closed down.
4. Resize the texture shot so that it fits exactly on top of your start image. Go to Edit...Transform... Free Transform and drag on a corner handle to increase or decrease the size of the texture shot. When you have it so that it is smaller than your start image, hit the enter key to accept what resizing you have done so far and drag it into the top left corner of the start image. Now go back to the free transform as before and drag the bottom right corner of the texture out until it meets the corresponding corner of your starter and again hit the Enter key.
5. You will now see only the texture, which is completely obscuring the start image. If your layers palette is not already open, go to, Window... Layers to bring it up and you will see that you now have a two layered image. The background layer will be your start image and Layer1 will be your texture. Make sure Layer1 is active by just clicking once on its name so that the background to the name turns blue. The blue layer is always the active one. Note the word "normal" at the top of the layers palette. Click on the downward pointing arrow to its right and you will open a long list of options. These are worth experimenting with as they blend the active layer with the one below in different manners. For the moment just click on Multiply.
6. Now for the clever bit. You are going to erase parts of the texture to reveal more of the background beneath it. Again with Layer1 active, select the Eraser tool. Look up above where the tool options are displayed. Where it says Brush, click the downward arrow and pull the hardness slider most of the way to the left. This gives it a nice soft edge. Move the Master Diameter slider about half way along its scale. This alters the size of the tool tip. As you work you can increase the size by hitting the right square bracket key... this one ] a few times , or decrease the size with the left square bracket... this one [ Now here is the big secret. Where it says Opacity in the options, click on the arrow to its right and this will reveal another slider. Slide this back to about 10%. Less for some work, more for others but 10 is a good starting point. Now, erase away the texture to reveal as much of the background layer as you wish. Take it easy. Speed will come with experience. For now have patience. If the erasure is too weak or too slow you can increase the opacity but be careful or you may take out too much.
7. Now that you are happy, go to... Layer...Flatten Image. If you now look at your layers palette you will see that you now have only one layer again.
8. Time to spruce the image up if it is looking a bit flat. You can use either levels or curves to do this. I always use curves. Image... Adjustments...Curves. You will see that the tonal curve of the image is represented as a straight line. Try experimenting by pulling the line down just a tiny amount at the first intersection of the graph in the lower left corner and by pushing the line up, again just a small amount, somewhere near the centre. It's hard to be exact about this as all images are different and you may have one which doesn't need this step at all.
9. Now we add some sepia. Go to Image...Adjustments...Colour Balance. Three sliders will come up. Push the top one toward red to the tune of about +15 and pull the bottom one towards yellow to read about +25. These are only starter values and the exact amounts for your image will depend on what you like the look of.
10. Nearly done. Repeat Step8 if the image is looking a bit flat or light or dark, until it looks good.
11. Finished at last! Go to File... Save As and choose a name and location for your new masterpiece. Don't forget when saving a JPEG file, ALWAYS choose a compression value of 12 when asked, for a file you intend to keep. The lower values will compress the file size for easier transmission over the net, but will rob you of the quality you have just painstakingly laboured to achieve.
As long as I haven't left something out you now have a shot worthy of framing.
Finally, this may look frightening at first glance, but after doing two or three you will discover that it is really quite an easy task and great fun too. Best of luck with it.
Finally, this may look frightening at first glance, but after doing two or three you will discover that it is really quite an easy task and great fun too. Best of luck with it.
