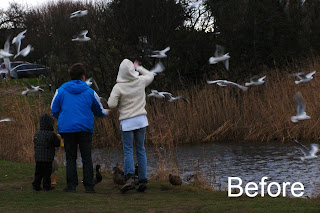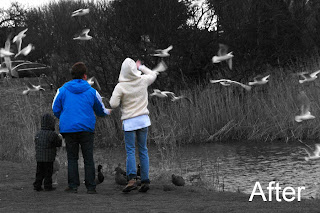

I often get asked about "Colour Popping" which is a method of producing an image which while converted to black and white, contains some elements of colour within it. Given an appropriate starter file it can be a good technique to master and with which to throw emphasis on a particular item or items within the shot. As usual in Photoshop, there are several ways to achieve the same end and I may come back to this subject with another method some day, but for the moment, this is probably the simplest method of all. One thing to remember though is that using this method demands that you be accurate in your work. When you use the eraser as outlined try to get it right first go. If you carry on, after making an error it is often not possible to retrace your steps and you will mostly have to start all over again. This technique will work with every version of Photoshop or Photoshop Elements that I have ever used and should be easily possible with any other piece of software, so long as it allows you to work with multiple layers, in this case just two. So, here we go :
1. Open your original photo.
2. Go to, Layer... Duplicate Layer and click OK in the resultant dialogue box.
3. Ensure the duplicate layer is active and convert it to black and white by whichever method you prefer. The simplest way is to go to, Image....Adjustments....Desaturate.
4. Select the eraser tool and choosing a reasonably soft edge while working on the duplicate layer, gradually erase away the black and white image where you wish the colour to show through. This will allow the colour of the original file to become visible.
Tip : You will need to decrease the size of the eraser in order to work into small areas. Use the square bracket keys to increase/decrease the size of the eraser. The square bracket keys are these guys [ , and ] and are found over beside the ENTER key on the keyboard. Use [ to decrease the tool size and ] to increase it. Repeated tapping of the appropriate key will resize the tool quickly.
5. When you are satisfied with your work, flatten the file down to a single layer bu going to, Layer...Flatten Image.
6. Finally save your image with a new name in order to preserve your original file. Do this by going to File... Save As and typing in a new name.
Happy Hunting!
No comments:
Post a Comment